AI Task Generator for Jira - User Guide
Last modified: November 27, 2024
Project Data Separation
One of the key features of AI Task Generator for Jira is its ability to keep project data completely separate. This ensures a clear and organized workflow, especially when working on multiple projects simultaneously.
How It Works
Project-Specific Data:
- When you generate epics and tasks for a specific project, all related data—including project plans, epics, user stories, and tasks—remains confined to that project.
- Switching to another project will not display data from the previous one.
Starting a New Project:
- When you begin a new project, the app starts with a blank slate.
- The Project Details text box, generated epics, and tasks will all be empty, allowing you to create a fresh project plan without interference from other projects.
Benefits of Data Separation
- Clarity: Keeps project-specific information isolated, making it easier to focus on the tasks at hand.
- Organization: Ensures that generated tasks and plans remain relevant to the specific project being worked on.
- Flexibility: Allows for independent workflows across multiple projects, preventing overlap or confusion.
Getting Started
Welcome to the AI Task Generator for Jira! This guide will help you start using the app to create and manage tasks in your Jira projects efficiently.
If you haven’t installed the app yet, head over to the Atlassian Marketplace to find and install AI Task Generator for Jira.
Steps for Installation
- Log into your instance of Jira as an admin.
- Select the Apps dropdown menu from top navigation bar, and choose Explore new apps.
- Once the screen loads, you can type AI Task Generator for Jira in the search bar to find the appropriate app.
- Select the app tile and the app details page of the specific app loads.
- You can select Get app to install the app.
- Once the app is installed, you will be notified via a success message. Following which, you can start using the app.
- The App will appear on the left menu of the project page. You might have to scroll down in order to access the app as it’s on the bottom of the menu.
(Please note: These steps are only for admins. If you are not an admin, then you have to select ‘Get it now’, and then request for the app by selecting ‘Submit request’)
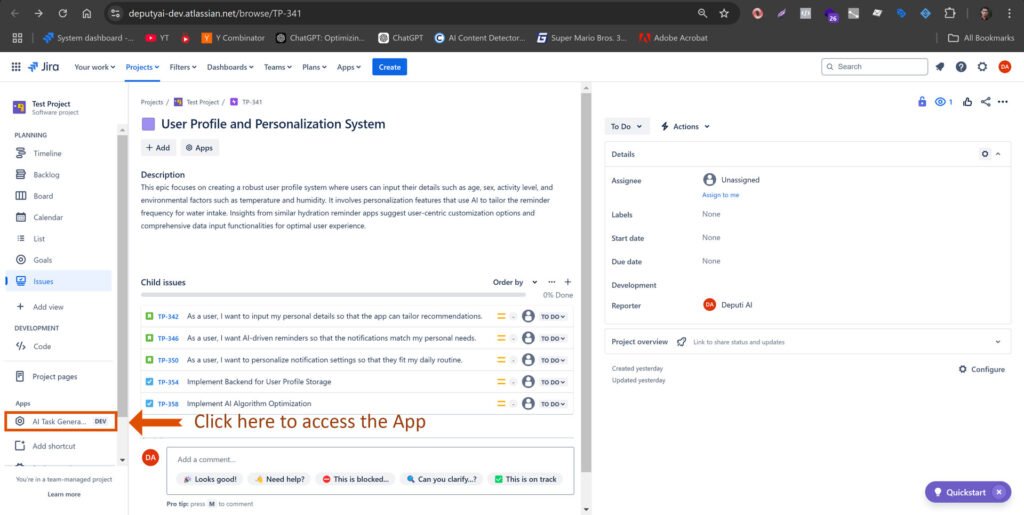
Adding Project Details
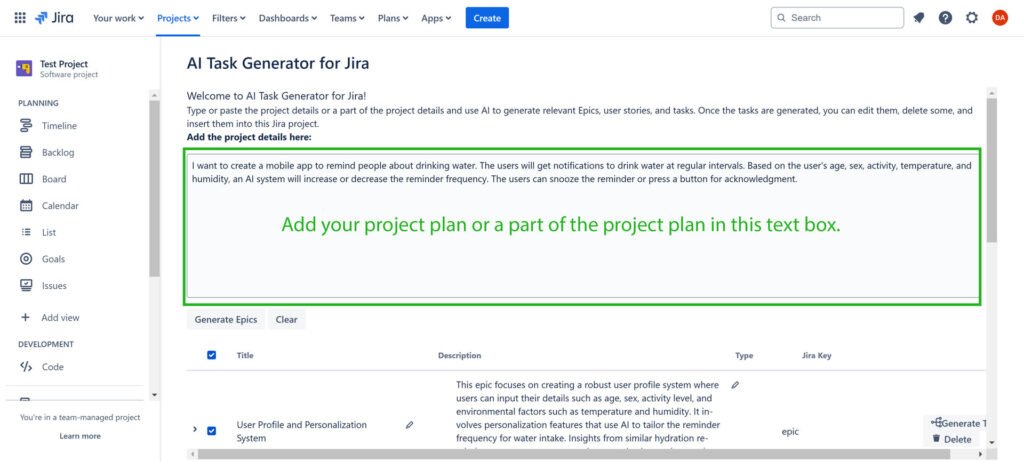
At the top of the AI Task Generator page, you’ll see a text box labeled Project Details.
For a New Project:
- Use this box to input your project description, objectives, or specific features you’d like to work on.
- Click Generate Epics to create a set of epics based on the project details you’ve provided.
Adding Specific Features:
- Instead of a full project description, you can also input smaller components like “User Management” or “Payment Gateway Integration”.
- The system will generate epics focusing on these specific milestones.
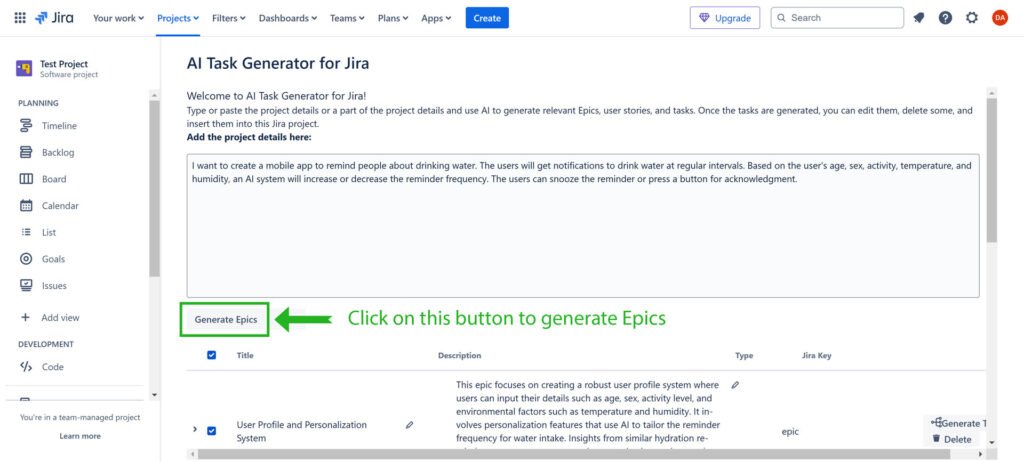
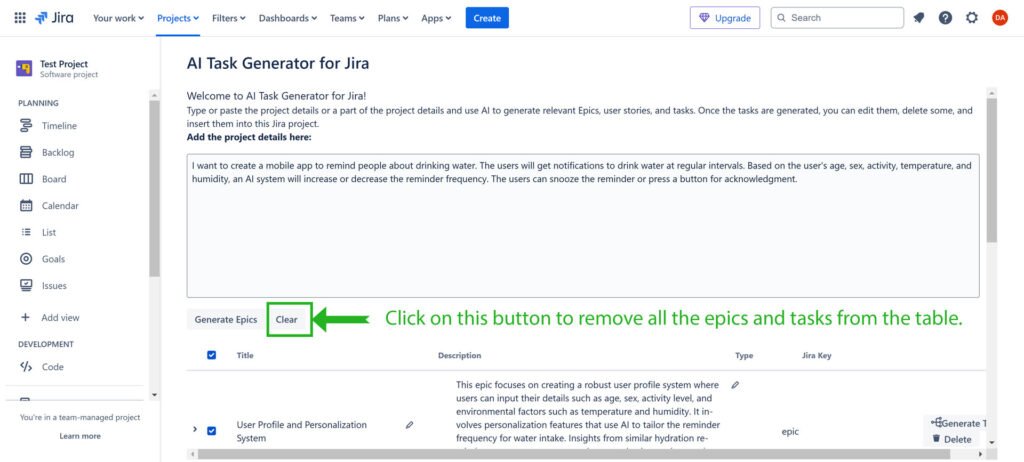
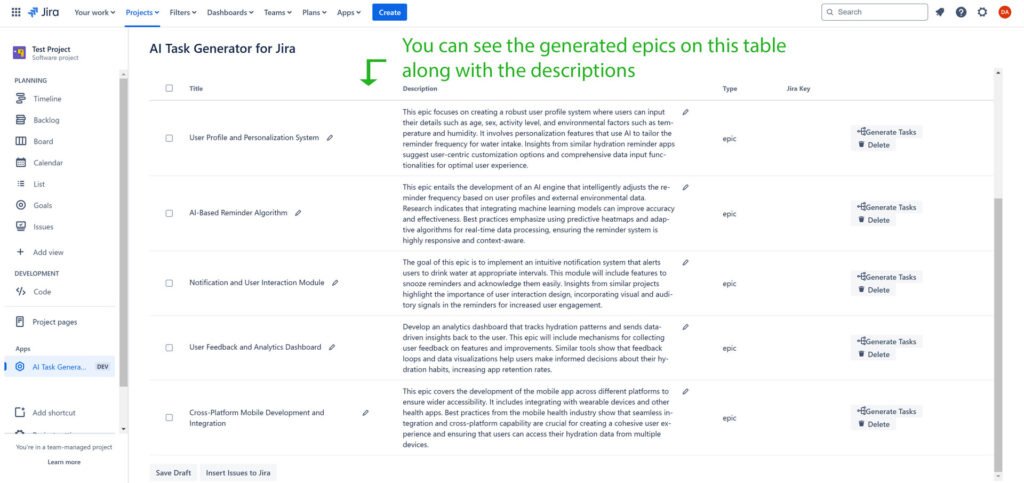
Managing Epics
Once the epics are generated:
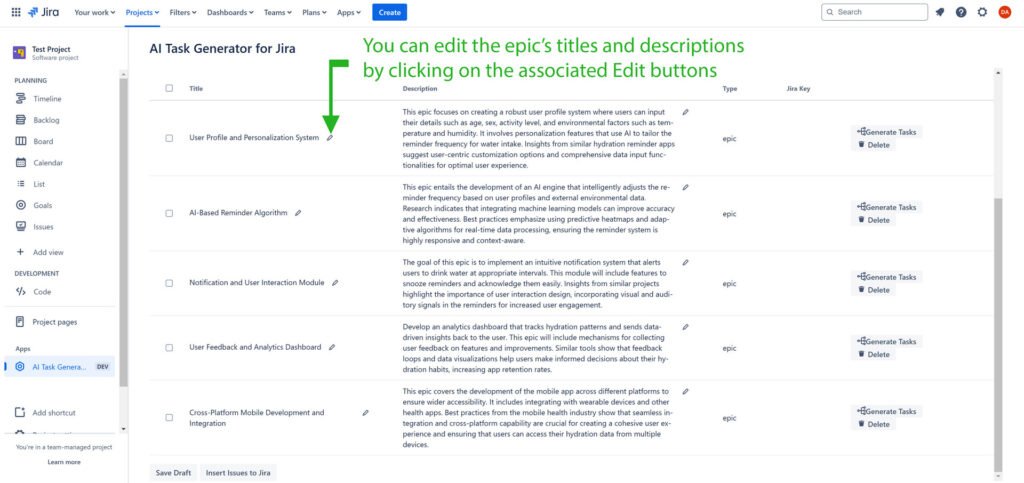
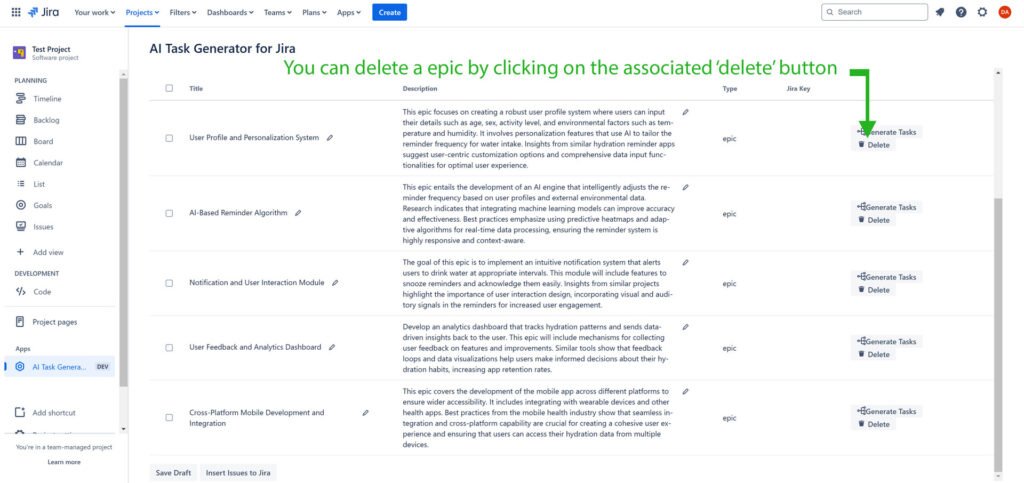
- Edit or Delete: Review each epic, and if needed, make edits or remove unnecessary ones.
- Related Tasks: If you delete an epic, the associated user-stories, tasks and sub-tasks will also get deleted.
- Generate Additional Epics: If you need more epics:
- Add more details to the Project Details text box and click Generate Epics again.
- Alternatively, generate additional epics later as needed.
Generating User Stories and Tasks
When you’re satisfied with the epics:
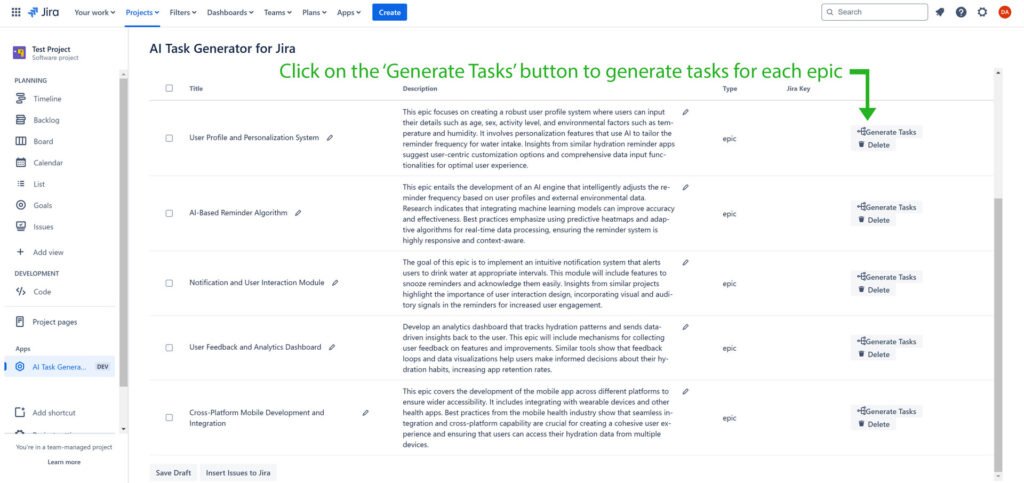
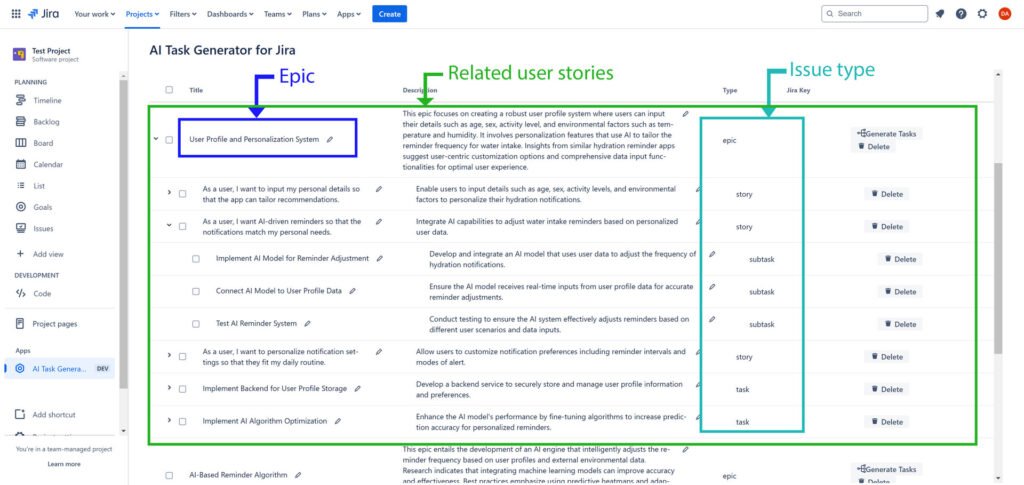
- Click on the Generate Tasks button.
- The system will create detailed user stories and tasks for each epic.
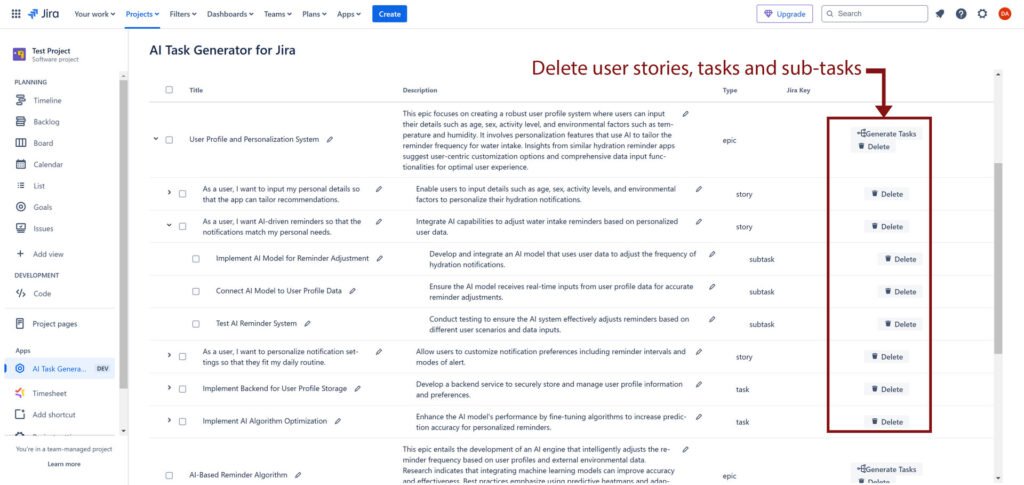
- Edit or Remove: Make changes to any user stories or tasks as necessary.
- You can Edit or remove all kinds of user stories, tasks and sub-tasks.
- If you delete an epic, all the related user stories, tasks and sub tasks will get deleted. Similarly, if you delete a user story or a task, the associated sub tasks will be deleted as well.
Inserting Tasks into Jira
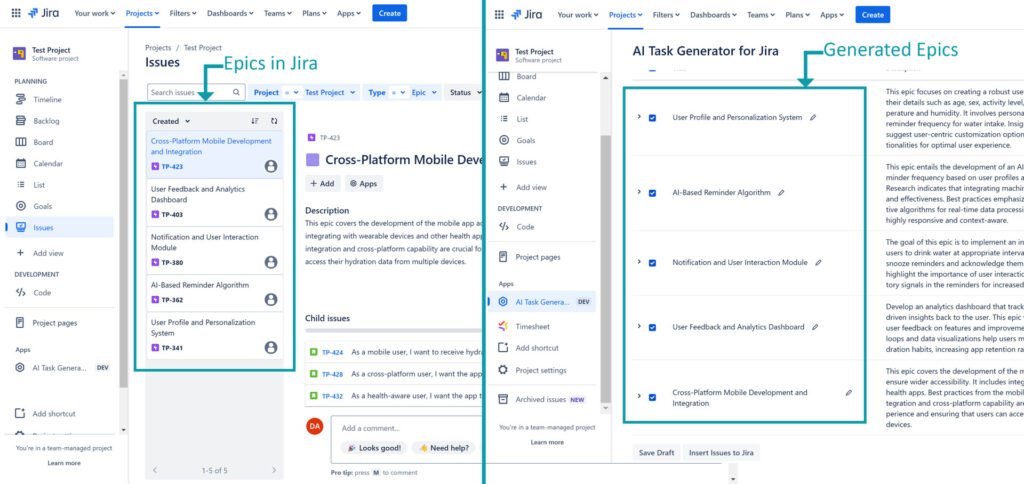
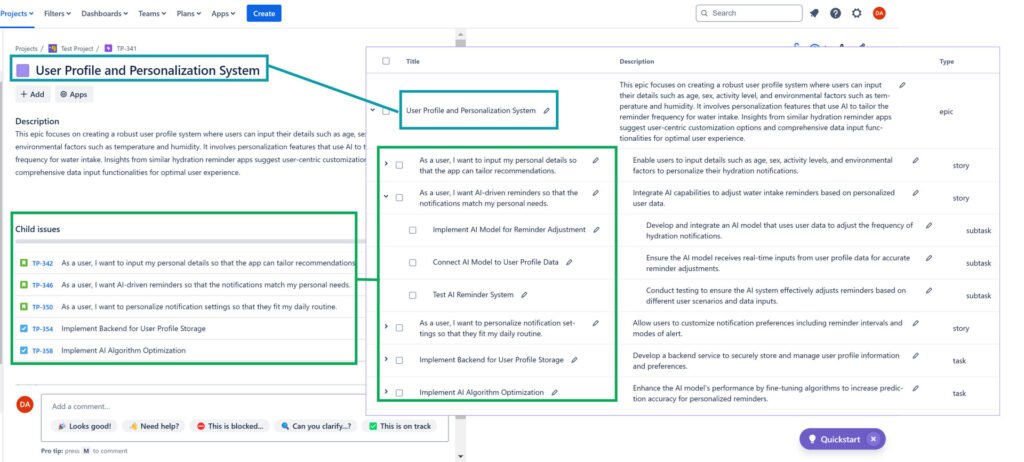
You can add the generated tasks directly to your Jira project:
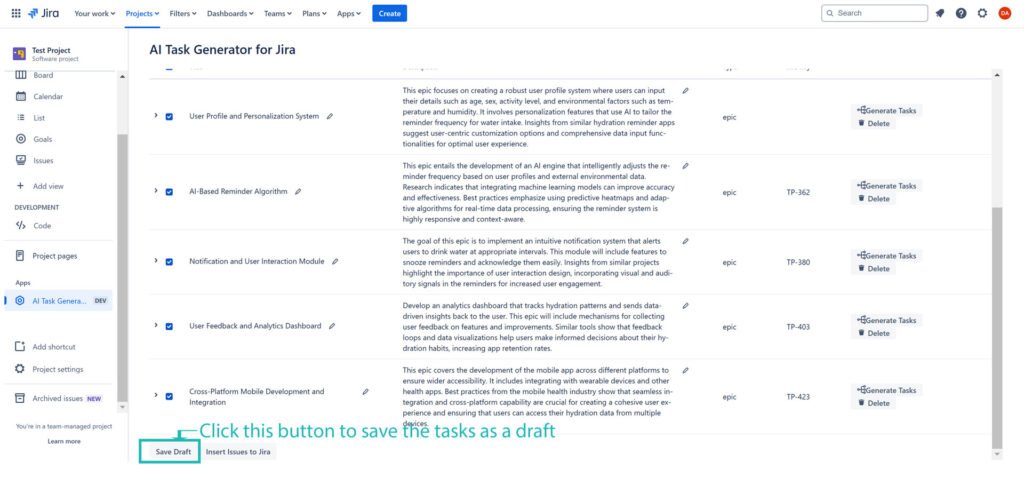
- Once the required tasks are generated, you can either start inserting the tasks into Jira or save them as a draft for future use.
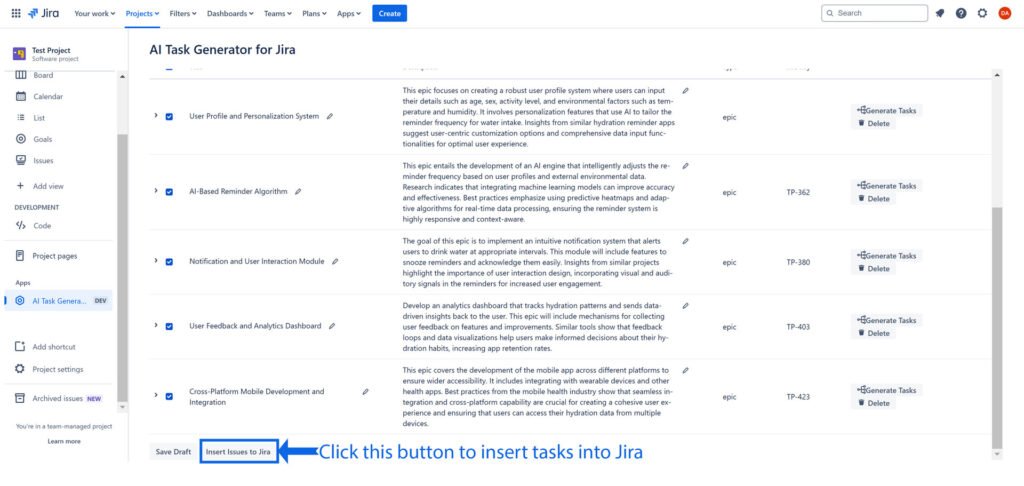
- Select individual tasks, user stories, or entire epics using the provided checkboxes.
- Use the Insert Tasks to Jira button to add them to your project.
- Using the checkboxes, you can also select all tasks at once and insert them in bulk.
Updating Tasks Post-Insertion
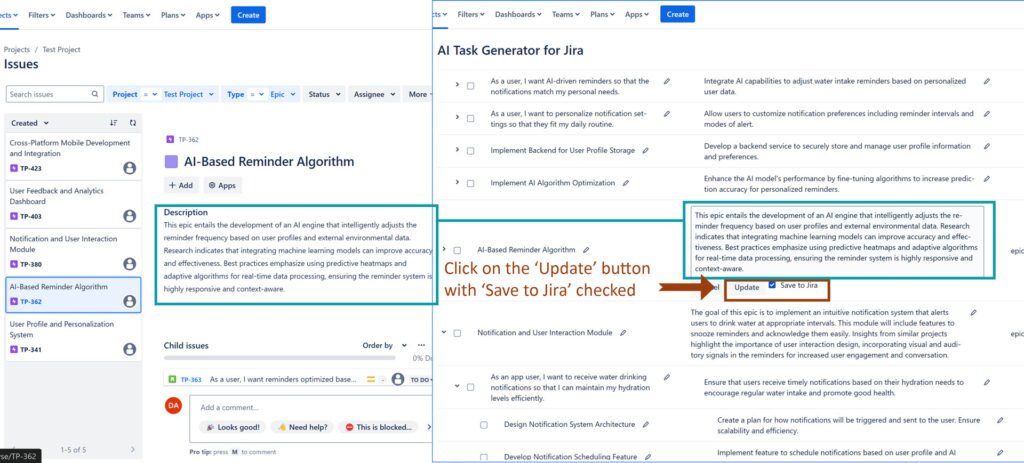
Even after tasks are inserted into Jira, you can:
- Return to the AI Task Generator interface to make further edits.
- Update existing tasks or add new ones as your project evolves.
- When you update the title or description of an epic, user story, or task with the ‘Update to Jira’ checkbox selected, your changes will automatically sync with the corresponding item in Jira.
Tips for Optimized Use
- Start small by generating tasks for a single milestone before expanding to a larger project scope.
- Make use of the Edit functionality to tailor the generated tasks to your team’s workflow.
- Use the bulk insert feature to save time when adding multiple tasks.
